Showing posts with label makeup. Show all posts

Tuesday, September 29, 2015

Makeup Mondays: 6 things every girl should learn


 Please just ignore the poor quality of this photo and that huge zit on my forehead.

Last week, on September 20th, my oldest daughter turned 12 (holy shit, right?).  She's just one year away from being a full-fledged teenager and I've pretty much been freaking out for the past year already.

Recently, over the past several months, she's picked up more of an interest in makeup/beauty and has been asking me questions about how to do certain things or how to use some of my makeup/beauty products.  Now, while I'm still against her going out in public in full-faced pageant-style makeup, there are a few things I feel that every girl should learn while they're in their pre-teen/teenage years.

Hair Removal.  Shaving, waxing, plucking - all girls should learn the proper way to do these things.  During puberty, hair starts popping up everywhere and it's important for us to teach our daughters how to control the madness without accidentally cutting ourselves or ripping our skin off.

Brow maintenance.  If I knew then what I know now, I wouldn't have to fill in the sparse areas of my brows from years of over-plucking.  Learning how to properly shape and groom your natural brows will lead to less maintenance in the long-run.  Last month, my daughter asked me to take her to get her eyebrows waxed to which I firmly said:  "Hell no.  You're gonna learn how to do it the hard way like I did in the 90's."  I did however, buy her the ABH Beauty Express Kit to start with.  It comes with stencils she can use to shape her natural brows without over-plucking.  Once she's familiar with it, I'll probably get her the Younique Brow Set to use on a daily basis.  Let's just hope that pencil-thin brows never come back in style.

How to properly use mascara.  It's no surprise here that my daughter has already used the Younique Fiber Lashes+.  It can be a bit dramatic for everyday use at her age, but on picture days or at dances/performances just one coat adds a nice little extra pop to her already bright eyes.

Winged Eyeliner.  When I was a teen I used to love playing around with eyeliner.  I wouldn't rim my eyes with heavy jet-black liner but I did have so much fun using different colors to line my eyes.  Blue, purple, gold, green - it was a great way to add some color to my face without looking too done up.  Learning how to perfect the "winged eyeliner" is a great skill to have because even by itself, it creates a whole new look.  Even now, at almost 30 (seriously, wtf) I still have fun with the different colors of Younique Eyeliners that I have.  Probably not going to use purple eyeliner to fill in my brows again though.

Smoky Eye.  I really could have saved my parents a lot of money if I had just learned how to do a smoky eye when I was a teen.  Every homecoming, winter ball, and prom we would be at the MAC counter spending money for me to get all glammed up.  At the time you could get your makeup done for free - so long as you buy at least $50 in products.  And it was pretty much the same look every time, just in different colors - black smoky eye, brown smoky eye, purple smoky eye, etc.  And while it is fun once in a while to have someone do your makeup for you, it really is much easier and cheaper to buy a good eyeshadow palette and browse Youtube for some tutorials.  I'm currently collecting these Younique Shadow Palettes because they're so convenient and you can create so many different looks with one.

Skincare.  What goes on must come off and having a good skincare routine is extremely important no matter what age.  During my early teenage years I broke out constantly because I ate greasy foods, drank lots of soda and never really had a solid skincare routine.  It wasn't until my late teens that I started using cleanser, toner, moisturizer, etc. regularly.  Now that my daughter is heading into her teens, she's also started breaking out with a pimple or two on occasion and since she plays sports all year, it's even more important to clean all the sweat and dirt out of her pores in order to prevent breakouts.

While there are lots more beauty "how-to's" and tips out there, I feel like these are the basic, essential things that I learned back in the day that still apply today and will probably still apply in the future.  I mean, unless shaving your eyebrows off becomes a thing, you really can't go wrong with having these skills under your belt to use when needed.

What do you think?  Do you have all of these skills down?  What would you add to this list?  Are you a victim of over-plucking?  Do you have daughters that you would like to lock up in a tower forever and ever?

Tuesday, August 25, 2015

Makeup Mondays: YSL Touche Eclat Blur Primer and Perfector [Review]

Yay!  Another makeup post!  Honestly, I'm such a huge makeup geek (always have been, always will) so I love posting these.  #sorrynotsorry if it's not really your jam.  I understand, but I still hope that these posts are informative and inspirational to you if, perhaps sometime down the road, you may be looking for a new lipstick or wanting to try out contouring or wondering wtf a primer is and why you need it.

Anyway.

I was so stoked for this post ever since I got an email saying I was chosen to receive the Influenster YSL voxbox.  I've been a member of Influenster for the past few years but have NEVER been chosen for anything so finally being chosen was kind of a big deal for me and throwing YSL in the mix - I was one happy makeup geek.


Now, time for a little honesty:  Though I am a HUGE makeup geek, I am also a very cheap one.  I will not dish out loads of cash for brand name stuff if I know that I can get something almost exactly the same for way cheaper.  Laura Mercier, Make Up Forever, Dior, and yes, even YSL were brands I never bought.  So being able to try out two YSL products for free - yes, please!

The products I received were the YSL Touche Eclat Blur Primer and YSL Touche Eclat Blur Perfector. The product info, according to Sephora.com is below:

(Primer)

(Perfector)


FIRST REACTIONS

Primer:
Why is this bottle so tiny?  What's with the glitter?  It looks like the body shimmer I used to buy back in middle school. Oh, it's a wand applicator.  I don't know how I feel about that.  Hmm...it's not as thick as my regular primer.  Yeah, nope - don't like this wand applicator.  A little more of an oily feel than my old primer...but, heyyyyyy this is going on so smoothly!  Wow, my skin feels so silky!  Okay, the glitter doesn't show much.  Kinda makes my skin look nice and glowy.  Oh wow, my regular powder foundation looks so great over this!  Damn, this little bottle really packs a punch!

Perfector:
Ohhh, it's so cute!  Okay so there's a pad to this.  Why is the pad separate?  Oh cute, the inside is the same shade of pink as the outside.  Kinda looks like lip balm...but feels kinda like a powder?  Oh wow, so silky.  Hey, it really does have a blurring effect.  Oh, yuck the pad has my foundation on it now.  Oh, okay, I get it now - it's like the balm fills in pores, creases and lines and then fills over them with the foundation I already put on my face.  Cool, no shine in my oily areas!  I wonder if it would be better to use it before I put my makeup on?


The Primer is pretty cool.  It really did hold my makeup on and made my powder foundation look like it had better coverage like a liquid. I did see on Sephora's website that the primer actually is a lot bigger than the sample size I received and that it is a pump applicator rather than a wand one which is the main issues I had with the one I got.  Other than that, I really did like the primer though I haven't fully tested it against my Younique one (pigmentation, water resistance, long-lasting, etc.) so I really can't give you a full comparison yet.  Maybe I'll start collecting other primer brands and compare the lot against each other.  To the death.

As far as the Perfector goes, there's really no product that I have ever tried that I can compare this to.  I really really really love the Perfector.  It's like a filler - my fine lines, creases, pores, freckles, etc. are filled in and covered with the transparent balm and it picks up a little bit of my foundation to cover the filled in areas and blur it out.  Like, no Instagram filter needed!  It also really helps at mattifying shine without those icky wax paper sheets (those don't work on me, btw).  I can honestly see the difference the instant I put it on because my features don't look as harsh and it makes my regular powder foundation look like it's airbrushed and my skin looks flawless.


Now, down to the price (via Sephora):  The full sized Primer is going for $52USD while the Perfector is listed as $55USD.

Would I pay that much for it if I hadn't tried them?  Hell no.

Would I pay that much now after I've tried them already?  I'd say probably not for the Primer - I haven't had enough time to test it out against my regular (cheaper) Younique primer so as of right now, no.  The Perfector I'd consider splurging on because there isn't a product out there (that I know of) that can give me the same effects as it does.  (If you know of a similar product, let me know!)


So what do you think?  Have you tried any YSL beauty products?  Would you splurge on these?  What primer do you use (if any)?

Monday, August 10, 2015

End of Summer Giveaway Pt. 3: Younique Fiber Lashes+

Time for another giveaway! Though I still haven't gotten around to ordering my own set of Younique's Fiber Lashes+ (bills come first, makeup second), I wanted to give one of you the opportunity to try it out too.  The original Fiber Lashes are still my favorite thing ever, and I cannot wait to try and share the new Fiber Lashes+ with you all.  So, once a winner is chosen, I'll order the winner's set and my personal set so we can try it out together!


This one's all on me so there's just one simple entry in order to qualify!  Good luck!

Monday, October 6, 2014

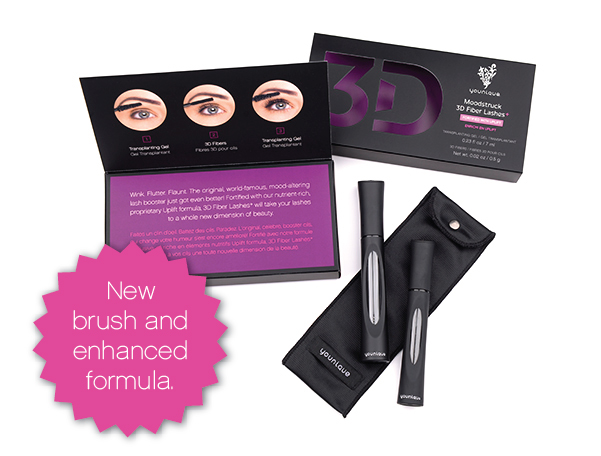
Makeup Monday: Younique Moodstruck 3D Fiber Lashes [Review]


It's about time that I do a makeup/beauty post, right?  RIGHT.  Okay, so every once in a while I get a chance to try out a new makeup/beauty product.  Some things I get for free from sponsors to try out and review, and other things I buy on my own to try out and will provide my two-cents about it here on the blog if I feel strongly about it.  This post is the latter.

Now some of you may have heard about Younique's Moodstruck 3D Fiber Lashes already.  I had no idea what it was until a friend of mine posted her before and after photos on Instagram.  The difference between the photos was so dramatic that I just had to look it up and give it a try.

Those who know me, know that I'm all about the eyes.  Eyeshadow, liner, mascara, falsies - you name it, I've got it - in bulk.  I rarely leave the house without a coat of mascara on.  I believe that having killer lashes can make a huge difference on your appearance.  Long, curled eyelashes make you look much more feminine even if you don't have a speck of makeup on your face.  If you don't believe me, just try curling your lashes and putting on a coat of mascara.  Go ahead, I'll wait.

Okay, now that that's settled...I've tried and tried to find the PERFECT mascara that can make my eyelashes look like it does in the ads.  I've spent lots of money (because even a tube of mascara isn't cheap) on trying to achieve fuller, longer lashes without any luck.  I used to use falsies - but dealing with the glue every day was a major pain in the ass and also my eyes.  Plus, falsies look like exactly that - fake and unnatural.  I even used to get eyelash extensions.  They looked a lot more natural and I only had to get them done every few weeks but they ended up pulling out my natural lashes so when I finally stopped getting them done my lashes were short and sparse as hell.  I ended up having to spend more money buying serums and conditioners to get them back to normal.

After all the grief my lashes and I have been through, I'm glad to say that I've finally found the perfect product for them.  Younique's Moodstruck 3D Fiber Lashes are it.  The kit comes with two parts:  1) the Transplanting Gel and 2) the fibers.  Basically it's a 3-step process (more, depending on how you want them to look).

Step 1:  Curl your lashes and put on your regular mascara.
Step 2:  Apply the transplanting gel.
Step 3:  Apply the fibers immediately after the gel and then put another coat of the gel to seal the fibers in place.

I personally opt for no mascara underneath.  It clumps less without it and the gel and fibers do a pretty great job alone.  Also, I sometimes add a second coat of fibers at the tips just for a little extra length and then go over it with a spoolie (the thick mascara wand thingy they use for testers that I got from my local MAC counter) to brush out any clumps or loose fibers.

I'm going to do a tutorial video soon but just so you can see how awesome it is and how much of a difference it makes, here's a few pictures:

Bare, curled lashes.


Left side with mascara and Younique, right side mascara only.  (See that difference?!)


They last all day and overnight without smudging much.  And it can be easily removed with makeup remover.

I bought this for myself with my own money to try out and I was hooked after just a few days of using it.  It's seriously THAT good.  I loved it sooooo much, in fact, that I decided to become a Younique Independent Presenter!  I wouldn't back a product I didn't absolutely 100% LOVE so you know this one is definitely worth it.

I'm still in my first month of being a presenter and so far I'm loving it!  I get to play with makeup as a side job - definitely something I can do for the rest of my life.  If you want to find out more about it and get your own set, just click HERE or any of the other links throughout this post to get to my Presenter's page and browse all the awesome products and shop for your own set of 3D Fiber Lashes.

Go.  Now.  You'll love it, I promise!

Wednesday, December 11, 2013

My 7 Sins of Beauty...

It has been quite a while since I've done any beauty-related post, mostly because I've been lazy.  Seriously, do you know how hard it is to put a beauty tutorial together?  I give mad props to all the beauty gurus on YouTube for all their hard work!  Putting a look together, recording, editing, and taking pictures of your face all day is tedious and tiring!  And if you're like me, you're still never completely satisfied with the end product.

Anyway, I have been doing makeup a lot lately, just haven't been taking pictures (besides IG) and posting about it.  I do plan on putting a tutorial together sometime this month (if I have time) on my new everyday look because I just recently joined the bandwagon on contouring and highlighting.

It was quite a trial and error process because it took a while for me to get a natural-looking face that I could wear throughout the day, but I'm pretty satisfied with the routine I came up with so I'm excited to share that with you all soon.  For those of you who have never tried contouring or highlighting, this will be your chance to try it out and get your feet wet a little, so stay tuned for that!


So today's beauty post is actually a tag post from 7% Solution.  I read hers and wanted to do my own so she welcomed me to join in and I welcome all of you to do it as well!


Greed:: What is your most expensive beauty item?

Of all the makeup I use on a daily basis, the Anastasia Beverly Hills Beauty Express is probably the pricey-er item.  It's about $40 at Sephora but I use it every single day and it is well worth it!

Wrath:: Which item do you have a love/hate relationship with?

 Do brushes count?  I love my makeup brushes but I HATE having to constantly clean them.

Gluttony:: What brand makes up the most of your collection?

It's probably a tie between Coastal Scents and MAC.

Sloth:: Which product do you neglect the most due to laziness?

Nail polish counts, right?  It is a rare occasion that I put a coat of polish on my nails.  And when I do polish my nails, I wear that coat until it has chipped completely off!  Seriously.  I literally have NO polish on at all right now.  Fingers or toes. 

Pride:: Which product gives you the most confidence?

Mascara, hands down.  My face looks instantly better with a curl and a coat.  My favorites right now are Benefit's They're Real and Lancome's Hypnose Star. 

Lust:: Which item is at the top of your beauty wishlist?

I'm currently looking for new lip colors and products to try out so it's pretty much anything lippy! 

Envy:: Which makeup product/look is great on others but not on yourself?

Neon.  I just can't.  Seriously.


Wednesday, November 6, 2013

Halloween

So I didn't get to do as many costume boards as I had planned for October, but Halloween was pretty fun around here anyway.  We had wanted to set up a little haunted house outside just for fun but since Halloween fell on a Thursday this year, we didn't have much time to get everything together in time and the following day was a work day so we ended up cancelling.  Thankfully, Halloween falls on a Friday next year so I've already started browsing and collecting supplies and decorations so we can have an AWESOME haunted house in 2014.

This year we stayed in our neighborhood and my in-laws came up and we had a lot of fun.  Everyone usually gets in the spirit of things around here so I spent the better part of my afternoon putting makeup on everyone.  By the time I was done with everything it was time to go so I didn't have any time to snap photos of all of us together but here's the few pictures I did manage to get.

The photos are grainy but I like how it makes it look creepier!

My nieces were #killinit that night with their face makeup!  Done by me, of course!


He said he didn't want to dress up this year, so he ended up throwing on a mask at the last minute.

My son, the shortest zombie ever.

Hello, Dolly.  Makeup was pretty easy to do so it didn't take me long to get ready!

My entire costume consisted of an old dress that I cut short and used the scrap fabric to tie around my waist, thigh-high socks ($4 from Wal-Mart), a black petticoat skirt (my sister had one she wasn't using), and black flats.

I think I had the most fun just playing around with makeup during the week of Halloween.  I googled different looks and tried my best to recreate them.  My favorite was this goblin look I did:


So how was your Halloween?  Did you dress up?  Go to any haunted houses?


Thursday, June 6, 2013

[Guest Post] Fresh-faced Easy Summery Makeup Look Tutorial

Hey everyone! I'm still on vacay and still super busy (today is Trace's birthday) so I don't have much time to sit down and write a post but I've got a very super special lady to cover for me today!

She's one of my blog-crushes and I'm so stoked that she's offered to guest post! She's absolutely gorgeous and she always looks flawless so take notes on this tutorial!! I've already got my notebook open!

P.S. She's also giving away $25 to Sephora in the BIRTHDAY GIVEAWAY that ends tomorrow! Hurry up and enter!!!
---------------------------------------------


Aloha, FrikkenDuckieFriends!!

Jessica/Duckie invited me to guest post while she is away with epic journeys in Hawaii and the Mainland US. (Thanks so much, Jessica! xo)

My name is Mae, and I'm a fellow Pacific Island style blogger like our girl Jessica here! I'm based in Hawaii Kai (East Honolulu), Oahu, Hawaii. You can find me writing intermittently at thereafterish.com. I'm super lucky to live in paradise, but as my website name suggests, "Happily Ever Thereafter" is only half the story. 'thereafterish.' is all about my style, beauty, finding happiness, and documenting this huge adventure that is my Hawaii Life--its ups, downs and in betweens.

Although we live in the "Kingdom of Eternal Summer" here in Hawaii, where it can feel summery year round, it can get pretty hot during spring and summer. I'm all about being easy and lighter on the makeup during the warmer months. I want to look, healthy, flushed and radiant, like I just got back from an amazing beach trip (which is likely, since I live in Hawaii!), but I don't want to feel like I'm wearing a ton of gunk on my face. This is the look I've been sporting for the last month or so since the mercury and barometer started rising.

This is how I achieved this glowy, chic and easy summer makeup look:


{ Makeup Used }

Clarins Beauty Flash Balm (Primer)
Chanel Correcteur Perfection concealer
Real Techniques Blending Brush
Eco Tools mineral makeup brushes
Tarte Amazonian Clay Finishing Powder
Korres Wild Rose Mineral Foundation in Medium Beige
Bobbi Brown Bronzing Powder in Golden Medium
Ecotools Kabuki Brushes
Illamasqua Blusher Powder in Lover (bright apricot)
Benefit Creaseless Cream Eye Shadow in Birthday Suit
MAC pigment in Vanilla
Lioéle Artist Auto Eyebrow Pencil in Grey Black
NARS Larger Than Life Long-Wear Eye Liner waterproof liner in Rue Bonaparte (nude)
Black waterproof eye liner (MUFE - Similar to Rimmel)
Vichy Thermal Water anti-aging mist
Shiseido eyelash curler
Kiss Me! Heroine Make Curl & Long fiber mascara (waterproof)
Physicians Formula Organic Wear Fakeout Mascara
Revlon Super Lustrous Lipstick in Kiss Me Coral
Revlon Super Lustrous gloss in Coral Reef
Tokyo Milk makeup bag

thereafterish, makeup look, easy makeup, simple makeup how to, coral color
{ Kissed by Coral makeup look with coral colors for a healthy, spring glow }
thereafterish, makeup look, easy makeup, simple makeup how to, coral color thereafterish, makeup look, easy makeup, simple makeup how to, coral color

I'm hoping you found this tutorial super easy. Although it looks like a lot of products, it's super light on the skin and makes you look fresh-faced, glowing, and healthy--perfect for spring and summer! And, best of all, it actually doesn't take too long to do!

Thanks for watching! Let me know if you found this tutorial helpful and tried it out by dropping a line on the video on my YouTube Channel (while you're there, please subscribe for more)!

You can also be my homies on my blog, thereafterish., on thereafterish.'s Facebook Page, Bloglovin', on Instagram (User @maeluu), and on Pinterest!

Much Aloha, Lovers!
Mae Xx

Saturday, May 11, 2013

Garnier Miracle Skin Perfector Oil-Free B.B. Cream [Review]

What a long name for a beauty product, huh?  Try saying that five times fast..garniermiracleskinperfectoroilfreebbcreamgarniermiracleskinperfectoroilfreebbcream...

Anyway, as you may or may not know, I'm part of the BzzAgent program which means I occasionally receive free products to try out, review, and spread some "Bzz" about.  The products I receive vary from beauty products, to air fresheners, to even fertilizer.  It is a pretty fun experience and definitely something all bloggers should look into.

Through BzzAgent, I received a free, full-sized tube of the Garnier Miracle Skin Perfector Oil-Free B.B. Cream a couple weeks ago.  By the time I got around to checking the mail that day, it was already late in the afternoon and my skin was pretty yucky and oily.  I couldn't wait to try it out so I immediately ripped it open and applied it to my face.

I.  WAS.  SOLD.

Let me just tell you that I have tried a few B.B. Creams in the past (even some Garnier ones) with horrible results.  They left me feeling extremely oily and after a couple uses I had started breaking out.  I had written off B.B. Creams as "not for me" - until this one.

As soon as I applied this to my face it pretty much soaked up all the oil and left my skin feeling smooth with a matte finish!  It evened out my skin tone and made it look as if I had makeup on without the heavy, cakey feel.  I was blown away.

I decided to give the product some time so I continued using it for the next couple weeks and I can honestly say that I have not had a bad reaction to it.  My skin looks flawless when I put it on, my pores are smaller, and my skin is SPF protected.


None of these photos were retouched or edited (okay, besides the "before" and "after" text) so you can see the difference this product makes.  I HIGHLY recommend this product to all you combination/oily skin people out there looking for a B.B. Cream that works for you.  To my dry-skinned peeps, sorry, but this may dry your skin out even more.

 This power-packed, all-in-one product controls shine, minimizes pores, evens skin tone, hydrates skin, and protects with SPF 20.  It is lightweight and I've been using it in place of my foundation since I got it - perfect for daytime wear, especially now that we're heading into summer.  No more-melted face feeling!  Yay!

In case you need more details on this:

  • Works on combination to oily skin with three shades:  Light/Medium, Medium/Deep (that's me), and Deep
  • Contains mineral Perlite, which retains twice its weight in oil and water to control shine
  • Formulated with sheer natural mineral pigments
  • Non-comedogenic and non-acnegenic which means it wont' clog pores or cause breakouts
  • Oil-free, non greasy
  • Available at mass retailers (Walmart, Kmart, CVS, etc.) for about $12.99
 So what are you waiting for?  Go out and get yours now!  I'd love to hear your experience with it!


**This product was given to me as part of a BzzAgent campaign.  I am in no way affiliated with the Garnier company or it's partners.**

Tuesday, April 16, 2013

Because Sharing is Caring

First off, I just want to say that my heart goes out to those affected by the tragedy that happened in Boston.  I was ironing my girls' uniforms when I heard it on the news this morning.  As soon as I heard "bombing" and "Boston", my heart dropped.  I immediately called my parents who assured me that my brother was safely away from the area.  (See, I do look out for you, little brother!)

Events like the Boston Marathon Bombing and the Tumon Stabbings just blow my mind.  I really cannot understand how a human being can deliberately cause so much harm.  I just don't get it.  When I see someone hurting or suffering, my heart breaks.  I would never wish that kind of harm on anyone no matter how angry or spiteful I was feeling.  It just does not make sense to me.

With all the hate and anguish going on in the world right now I thought I'd spread some love and aloha around by sharing a few things with you today.  It's like show and tell here today.

So my lovely Instagram followers (@frikkenduckie hey hey!) got a peek at this image last week and because sharing is caring, I thought I'd share with you how I made it.  It was a very long and tedious process to do this so if you're ready to take on that challenge then listen up on what you gotta do.


Okay, you ready?  Alright.  Click on this link, which will take you to the Texter App.  Then all you have to do is draw like you're using paint.  You can change the text, text color, background color, text size, and angle in the control box.  The long and tedious part comes when you're trying to figure out what you want to say and what you want to draw.

I hope you take advantage of this app because it really is AWESOME.  If you do create something, please share it with me!  I'd love to see it and I may even show it off here for you too!

Oh, and before you go and start getting all creative, I've got one more thing to share with you!  See this gorgeous gal right here?


That's Colleen and she is a makeup blogging goddess!  She creates such amazing looks and she is a genuinely amazing person.  Every time I visit her blog I am in awe of every flawless look she creates.  She is so inspiring and I really encourage you to check out her blog, Vanity and Vodka.  Like, now!

Oh, and because she's so awesome, she's actually having a giveaway right now that I highly recommend you enter.  I've already entered so go now before it ends!  And even though I know you awesome readers of Frikken Duckie are amazingly genuine and supportive, I just have to make sure that you don't just enter her giveaway to win free stuff.  We all know I love free stuff just as much as the next Asian, but I love my friends and followers more - so please don't enter if you're gonna be fake about it.

Till tomorrow, my pretties...

♥ Duckie.

Friday, April 12, 2013

Behind the Blog: Dresser Top Tour

Okay, so it's not such a big secret that I am a bit of a hoarder.  It is a VERY rare occasion that I let go of a piece of clothing, jewelry, shoes, bags, etc.  Closet purging has never been done around these parts.  Like, ever.

The ONLY time I give things away are times when (a) I'm sick/depressed and am going through an "I hate everything about myself" kinda phase; (b) I'm feeling EXTREMELY generous - and I end up getting more stuff to fill the void later on; or (c) when my sister and I are clothes swapping - because we're both very stylish and VERY selective of who wears our clothes.

I've had someone steal my things before so I think that incident traumatized me.  Homegirl was pretty slick about it and took things little by little so that I didn't notice until half my closet was just about empty.  She even took some of my jewelry including my grandmother's ring!  I've never confronted her about it because I didn't have solid evidence, plus she was just a kid at the time (I think middle school age) so I just let it be a lesson to myself.  Karma will come around for her eventually.

Anyway, since then I've built my closet back up and continue to hoard any and every item I get.  I NEVER say no to free things especially clothes because there are so many different ways to style and repurpose clothing items to make them new again.

Now, since Joey and I will be switching back to our old room soon I've decided to take a couple pictures of what my hoarding looks like now and continue taking pictures as my collection grows.  Before moving back into the other room I'll be redoing our closet space so I'll take pictures of my plans, before&after, and all that jazz eventually.

So, without further ado, here is the tour of just the top of my dresser right now.


 I found this little potpourri bowl left by my aunt and decided to use it for all my bracelets and hoop earrings.  

I have a LOT of bracelets.

Remember this DIY earring frame I made?

A piece of coral I found on the beach and a little aloha.

 Just some of my necklaces.

This rack was actually part of a utensil set I bought at Ross a couple years ago.  The set isn't complete anymore so I repurposed the rack.  Genius, right?  I know.

Some hair and face junk.  Obviously I didn't clear my things up because my makeup doesn't usually lay around on my dresser.

 My Julep collection is a work in progress.

More nail polish, some perfume, and my pencil/brush/beauty tool caddy.

Bird's eye view - if there were a bird in my room.

And in the small plastic drawers:

 Lip crap.

Hair crap.

 
 And just plain crap.

Annnndddd...some necklaces and bandanas hanging from my mirror.  I wrapped some Christmas tree lights around a couple dowels and placed them on the sides of my mirror for some easy and very pretty lighting.

Well that's it, folks.  The top of my dresser.  I'm sure you can imagine what the rest of my room looks like now.  I've got a LOT of stuff.  And it's all still a work in progress.

I'll be posting more of my hoarding in different parts because you know I can't fit it all in just ONE post.  What do you want to see next?  Clothes?  Shoes?  Makeup?  Comment below and let me know.  And if you think I need an intervention, you can comment that too.

Happy Friday, friends!

♥ Duckie.

Thursday, April 11, 2013

I think it's better if we just move on.

From the series posts, I mean.
You know, the whole "Makeup Mondays", "Tasty Tuesdays", and "What I Wore Wednesdays"...
Because I feel like I'm too confined to post something related to that topic.
And sometimes I feel like putting on makeup on a Tuesday and I'm feeling very tasty on a Thursday.
So I think I'll just let go of the whole series posts for now.  It's good to have a series of posts when you don't know what to write about, but when you've got a creative streak going, it kinda holds you back.

That being said, check out this makeup look I did on a (gasp!) Wednesday.


I had gotten these contact lenses from Pinky Paradise a little while ago and had been going bonkers trying to figure out what kind of look would show it off best

I was feeling very "makeupy" (yes, I just made up that word) yesterday and was thinking about doing a little peachy pink look and thennnnnn I came across this image on Pinterest yesterday and knew it would be perfect to recreate a more subtle, middle of the day, kinda look for it.  I loved how it turned out especially when I put my grey contact lenses on.  And for future reference, put contacts on BEFORE makeup - I learned this the hard way.

I've been using these lenses that I got from Pinky Paradise for a over two weeks now and I'm in LOVE with them.  I love how they look and feel more natural than other lenses I've tried in the past.  They also have a HUGE selection of prescription and non-prescription contact lenses on their site and the colors and styles are amazing!  They've got the basic colors like blue, grey, brown, and green which are great for everyday wear AND they've also got those crazy lenses that look like cat eyes or spiderwebs which are perfect for Halloween (*hint, hint*)!

 One of my favorite things about ordering these lenses were the freebies.  You know I'm all about freebies so I was stoked that every pair of lenses comes with a cute little animal case to store them in.  I was even more excited that they threw in an extra gift for me which has come in quite handy since my bangs always get in my way when I do my makeup and clean around the house.  I don't recommend going out in public with this though.

Basically, it's a strip of velcro to hold your hair back.
And because they're so awesome, all of the lovely readers and followers of this little blog can get a free mystery gift with every pair of lenses you order from Pinky Paradise by using the code: FRIKKENDUCKIE at checkout.  So that's two freebies for every lens you purchase (lens case + mystery gift = 2 times the awesomeness)!  How can you refuse that?

Simple.  You CAN'T.  Go now.

♥ Duckie.

**Items featured were courtesy of www.pinkyparadise.com but all views and opinions are my own.**