Showing posts with label tutorial. Show all posts

Thursday, December 12, 2013

Christmas Craft: Salt Dough Ornaments


Alright, so it's starting to get a little more Christmas-y in the Duckie household.  We finally got a tree on Friday night and Aniyah and I got to put it up on Saturday.  Note: Joey got the tree Friday night and he and my brother put it in the tree stand, but apparently the two of them think that just because the tree isn't touching the ground it's okay if it's crooked - it was pretty much at a 45° angle, hanging on for dear life against the front windows.  No joke.

Once the tree was set up properly, we pulled out the ornaments and decorations but the kids started griping about it.  "Why do we have to use the same stuff as last year?", and "Ooh, can we go buy new decorations?  Pleeeeeeease??", to which I sweetly replied, "Okay, let's just spend all our money on new decorations and ornaments and lights and everything else so that we don't have any money left to buy presents!!"  They changed their minds.

But since I'm not a total bitch, I agreed to put away last year's ornaments and asked them what kind of "theme" they'd want for our Christmas tree this year.  After an hour of deliberation, the three of them finally agreed that they wanted a "Colorful Crafty Christmas Tree" and we all started brainstorming!  And in case you didn't know, my kind of brainstorming is also called scouring Pinterest for ideas.

I came across a pin of a handprint embedded in salt dough and thought it would be a great way for the kids to display their doodles and drawings on the tree without having to waste my paper.  Plus, they thought it was cool that they would be able to use cookie cutters to make different shapes.  Obviously we don't make many cookies around here...


See how simple it is?  I made three batches and we still have a ball of dough left to make more.  We used Crayola markers to decorate ours (because I couldn't find the paint) and they turned out just fine.  I think paint would have made them look more ornament-y rather than cookie-ish, but the kids like the cookie look so it's all gooooood.

I've got a couple more Christmas Craft posts up my sleeve since we made a bunch of different decorations/ornaments so be on the lookout for them in the days to come.

Have you done any Christmas crafts this year?  Got any good pins to share?  Let me know!


Oh, and P.S., DON'T EAT THEM!  I mean, it won't kill you, it just doesn't taste very good.  Ask my brother, he knows.  ; )

Thursday, June 6, 2013

[Guest Post] Fresh-faced Easy Summery Makeup Look Tutorial

Hey everyone! I'm still on vacay and still super busy (today is Trace's birthday) so I don't have much time to sit down and write a post but I've got a very super special lady to cover for me today!

She's one of my blog-crushes and I'm so stoked that she's offered to guest post! She's absolutely gorgeous and she always looks flawless so take notes on this tutorial!! I've already got my notebook open!

P.S. She's also giving away $25 to Sephora in the BIRTHDAY GIVEAWAY that ends tomorrow! Hurry up and enter!!!
---------------------------------------------


Aloha, FrikkenDuckieFriends!!

Jessica/Duckie invited me to guest post while she is away with epic journeys in Hawaii and the Mainland US. (Thanks so much, Jessica! xo)

My name is Mae, and I'm a fellow Pacific Island style blogger like our girl Jessica here! I'm based in Hawaii Kai (East Honolulu), Oahu, Hawaii. You can find me writing intermittently at thereafterish.com. I'm super lucky to live in paradise, but as my website name suggests, "Happily Ever Thereafter" is only half the story. 'thereafterish.' is all about my style, beauty, finding happiness, and documenting this huge adventure that is my Hawaii Life--its ups, downs and in betweens.

Although we live in the "Kingdom of Eternal Summer" here in Hawaii, where it can feel summery year round, it can get pretty hot during spring and summer. I'm all about being easy and lighter on the makeup during the warmer months. I want to look, healthy, flushed and radiant, like I just got back from an amazing beach trip (which is likely, since I live in Hawaii!), but I don't want to feel like I'm wearing a ton of gunk on my face. This is the look I've been sporting for the last month or so since the mercury and barometer started rising.

This is how I achieved this glowy, chic and easy summer makeup look:


{ Makeup Used }

Clarins Beauty Flash Balm (Primer)
Chanel Correcteur Perfection concealer
Real Techniques Blending Brush
Eco Tools mineral makeup brushes
Tarte Amazonian Clay Finishing Powder
Korres Wild Rose Mineral Foundation in Medium Beige
Bobbi Brown Bronzing Powder in Golden Medium
Ecotools Kabuki Brushes
Illamasqua Blusher Powder in Lover (bright apricot)
Benefit Creaseless Cream Eye Shadow in Birthday Suit
MAC pigment in Vanilla
Lioéle Artist Auto Eyebrow Pencil in Grey Black
NARS Larger Than Life Long-Wear Eye Liner waterproof liner in Rue Bonaparte (nude)
Black waterproof eye liner (MUFE - Similar to Rimmel)
Vichy Thermal Water anti-aging mist
Shiseido eyelash curler
Kiss Me! Heroine Make Curl & Long fiber mascara (waterproof)
Physicians Formula Organic Wear Fakeout Mascara
Revlon Super Lustrous Lipstick in Kiss Me Coral
Revlon Super Lustrous gloss in Coral Reef
Tokyo Milk makeup bag

thereafterish, makeup look, easy makeup, simple makeup how to, coral color
{ Kissed by Coral makeup look with coral colors for a healthy, spring glow }
thereafterish, makeup look, easy makeup, simple makeup how to, coral color thereafterish, makeup look, easy makeup, simple makeup how to, coral color

I'm hoping you found this tutorial super easy. Although it looks like a lot of products, it's super light on the skin and makes you look fresh-faced, glowing, and healthy--perfect for spring and summer! And, best of all, it actually doesn't take too long to do!

Thanks for watching! Let me know if you found this tutorial helpful and tried it out by dropping a line on the video on my YouTube Channel (while you're there, please subscribe for more)!

You can also be my homies on my blog, thereafterish., on thereafterish.'s Facebook Page, Bloglovin', on Instagram (User @maeluu), and on Pinterest!

Much Aloha, Lovers!
Mae Xx

Thursday, April 18, 2013

Oops, I DIY'd It Again.

I don't know what's been going on with me lately but I'm still super motivated to do things and I'm loving it!  I've been cleaning, rearranging, cooking, crafting, and moving around so much the past few months that it's kinda starting to creep me out a little.  I have never liked being the domestic type and I'm a huge fan of sitting on my ass watching re-runs of the Kardashians all day so this new motivation bug I've got is really surprising.

Anyway, all this cleaning has got me to clean up my wardrobe a little.  Clean up, not clean out - I'm a hoarder, remember?  I took out all the clothes that need minor repairs, have small stains/rips in them, as well as everything that I hoarded from someone else just for the sake of hoarding.  I told you I have issues.

I did most of the minor repairs like buttons, beading, hemming, etc. already so that pile is almost finished and back in my closet.  With the other clothes I kind of got a little scissor happy this week and started turning some blouses and tops into cardigans.


It's pretty cool to see what a difference a pair of scissors can make.  It completely transformed this fugly printed top into a cute little cardigan.  I'm sure you have some fugly, outdated blouse that would make a perfect light-weight cardigan for those summer nights, so grab your scissors and get happy!


All you'll need for this is a blouse and a pair of scissors.  A stretchy/jersey type of material works best - other materials may fall apart if cut.

Step one and only:  Align the side seams (or make a fold down the middle of the shirt if your shirt has no side seams) and cut on the fold.

And that's it!  Simple and CHEAP 1-cut cardigan.  Now go raid those closets for some old tops!  It takes all of 2 minutes to do and it saves you $$$$$$.  The cost comparison is a no-brainer!


Please tell me you're already going through your wardrobe in your mind to figure out what top to cut.  And don't forget to let me know if you did it!  I always love seeing what others come up with!!!

♥ Duckie.

Monday, March 4, 2013

Makeup Mondays: Yet Another "No Heat Curls" Tutorial

As if we haven't had enough of them, right?

Well anyway, this is my rendition - which is basically like the others, except done by and featuring me.

Duh.

And this tutorial is exceptionally amazing because I HATE doing hair.  Seriously.  I cannot straighten, curl, blowdry, tease, updo, etc. without giving up after 5 minutes.  That's how pathetic I am.

My hair and I are not the best of friends.  It's lucky if it gets brushed 2 times a week.  It's like that really annoying friend you have that you don't have the heart to cut from your life but you still can't chat with for more than 5 minutes before making up some excuse to leave.

Anyway, so this one is pretty easy.  I did it so I'm sure you can do it too - if you haven't already done it before.  I don't even really need to do a step-by-step tutorial, but I'll do it anyway.  You know, just because I'm awesome like that.


 1.  Part your hair in the middle, Wednesday Addams style.  Then twist one section of your hair outwards (away from your face) and roll into a low, tight bun.


2.  This one's a no-brainer, but repeat the process on the other section.


3.  Leave it bun'd up for as long as possible - the longer you keep it up, the stronger and more defined the curl will be.

I kept mine bun'd up since yesterday and took it out this morning after I got up.  Hello - two days of hairstyles!  You really can't go wrong with this one.


 4.  When you're ready, take out and shake 'em a little.  Your hair, not your ta-ta's.  Though, we all should do that every once in a while.


5.  Now this one's important!  Unless you're trying to look like Simba after he shakes out his mane in the Lion King, DO. NOT. BRUSH. YOUR. HAIR.  Instead, take a section of hair and separate it into smaller sections until you're satisfied with the look.


6.  Last step - and an optional one - is to smooth out any frizzies with whatever you normally use and spray the curls lightly with hairspray to keep it holding longer.  Don't forget to take a picture of how great you look.


And that's it - you're done.  And I'm pretty sure you've got awesome curls.

AND you don't have to walk around lookin' like a hot mess with your hair rolled into a headband like some other curl tutorials.

You're welcome.

♥ Duckie.

Wednesday, February 13, 2013

Makeup Mondays: Sweet Valentine [Tutorial]

In the spirit of Valentine's Day, I've put together a look inspired by the romantic hues of the pink defender lily.

[via]

Lilies are one of my favorite flowers (my other favorite is the sunflower) and I love the pink and purple tones in the pink defender lilies - so much more fun to get than roses!


This look is so romantic and is a perfect way to stay festive whether you're swearing off love over lunch with your girlfriends or spending the evening with your special someone.


Products Used

Eyes:  Maybelline Color Tattoo Creme Eyeshadow in Too Cool, Coastal Scents 252 Ultimate Palette in Fancy Pansy, Love Spell, Purple Panic, Violetta, and Candlelight, Maybelline Eye Studio Gel Eyeliner in Blackest Black, Hard Candy Stay In Line Eyeliner, Maybelline Mega Plush Mascara.

A nude or pale lip will finish this look - a simpler lip balances out the heavier eye makeup.

Sorry it took me so long to post this - I've been having computer issues again so I'm using my sister's MacBook and iMovie is frikken CONFUSING!

Well, I hope you liked this little makeup look/tutorial!  I had a lot of fun making it (not so much fun editing it) for you!

If you want to see more makeup looks/tutorials, just let me know!

♥ Duckie.

P.S. Joey is a free man!  His case was wrapped up this morning and we're so stoked about it!  No jail time, no curfew, no restrictions!  Totally excited to be able to celebrate it with a date night!

Tuesday, January 22, 2013

I'm Alive + DIY Earring Holder

Sorry for the lack of posts and general blog participation lately.

The weather has been horrible lately and now every single one of us in the house is sick to a certain degree.

Anyway, so this post was going to be my little recap of the weekend and my rant about how I lost the memory card for my camera but as I was writing about it, I got the urge to try and look for it one last time and - yep, you guessed it - I found it!

So now, instead of a recap and rant, you get a little DIY tutorial.

----------------------


- Picture frame
- Scissors
- Hot glue
- Plastic grid sheet


Remove glass, backing, and generic picture from frame.


Measure and cut your plastic grid sheet to fit your frame.


Glue the edges of the plastic grid sheet and secure to frame.


Turn it around and pop some earrings in there!

----------------------------------------------

Alright, so I know this has been done a bajillion times but just be happy that my lazy butt actually did something productive, okay?  Sheesh.

Oh, and before I go, congrats to Robin for winning the Coastal Scents giveaway!

Thank you to everyone who entered!  You can go check out another giveaway I'm having on the Frugal Foodie Mama's blog!!!

♥ Duckie.

Monday, April 30, 2012

Makeup Monday: Grey smokey eye

Hooray for finally doing another tutorial.  My tutorial skills are improving.  Lol.  Today I actually laid out most (not all, obviously) of what I used in this look before I pressed record.  Hahaha.  I did have to grab the mirror and put it next to me while recording though.  Sorry!

I usually just do my makeup depending on how I feel.  I never really have a set look in mind when I put on my makeup in the morning.  I guess if I plan on doing more tutorials, I really should plan it out, huh?  Oh well.

So for this look I basically used one palette:  Tokidoki Adios Cromatico.  I don't know if these are even available anymore so here's the break down (in order of application):

Crease:  Grey shimmer

Lid:  Glittery silver

Outer corners:  Matte black

Highlight:  Neutral color close to your skin tone

This look is simple and easy.  I like to think of it as more of a Klassic Kardashian look.  You know how they love their grey smokey eyes.  Lol.  Oh well, enjoy!


Btw, the music cuts off towards the end.  Lol.  Still working on my editing skills.  Slowly...

Hope you had a mellow Monday and didn't get too stressed out!  And don't forget to email me about guest posting here on Frikken Duckie!  You know you want to!


Tuesday, April 17, 2012

Tasty Tuesday + So Frikken Crafty #3 (finally)

Okay, so to make up for my epic makeup fail yesterday(you like how I did that? Make up for makeup. Lol.) I'm giving you two awesome things today! Woohoo for you!

Let's start off with today's recipe! I have been craving beef stew for a while now, ever since I saw a post on Bison soup over at Made By Girl. Now I've never tried Bison meat, and I doubt they even carry that on Guam so beef stew is the next best thing.

Please be advised that I have never made beef stew before. The last time I remember eating beef stew was a few years back, when I was back home in Hawaii. My parents are great cooks and my dad always comes up with great new recipes all the time. Btw, don't tell him I said that. I'm notoriously rebellious against him and I make it a point to disagree with him about everything. If he finds out that I actually like his cooking, I'll never be able to live that down.

Anyway, so I decided to look up a recipe online, tweak it a little, and try to whip up some beef stew for dinner later this week (possibly tonight). Here's the recipe I'll be using:


Serves: 12
Prep Time: 30 minutes
Cook Time: 1 hour, 30 minutes
Total Time: 2 hours
Ingredients:

3 lbs boneless chuck roast, cut into 2-inch pieces
3 tbsp vegetable oil
2 tsp salt
1 tbsp freshly ground pepper
2 yellow onions, cut into 1-inch chunks
1/4 cup flour
3 cloves garlic, minced
1 cup red wine
3 cups beef broth
1/2 tsp dried rosemary
1 bay leaf
1/2 tsp dried thyme
4 carrots, peeled, cut into 1-inch slices
2 stalks celery, cut into 1-inch slices
3 large russet potatoes, peeled and cut in eighths
1 package of fresh mushrooms, sliced


Directions:

1. On medium-high heat, add the vegetable oil to a large heavy pot (one that has a tight fitting lid).

2. When it begins to smoke slightly, add the beef and brown very well. Do in batches if necessary. Add the salt and pepper as the beef browns.

3. Once browned, remove the beef with a slotted spoon set aside.

4. Add the onions and sauté for about 5 minutes, until softened.

5. Reduce heat to medium-low, and add the flour and cook for 2 minutes stirring often.

6. Add the garlic and cook for 1 minute.

7. Add wine and deglaze the pan, scraping any brown bits stuck to the bottom of the pan. The flour will start to thicken the wine as it comes to a simmer.

8. Simmer wine for 5 minutes, and then add the broth, bay leaves, thyme, rosemary, and the beef.

9. Bring back to a gentle simmer, cover and cook on very low for about 1 hour.

10. Add potatoes, carrots, and celery, and simmer covered for another 30 minutes or until the meat and vegetables are tender. Taste and adjust seasoning.

11. Turn off heat and let sit for 15 minutes before serving.

I'm a big hungry kinda girl so I love me some comfort food but I've also been going through a healthy-ish phase lately so the meat & veggies together is the best of both worlds. Plus, this recipe makes a whole lot of stew, so its perfect to store for a cold rainy day!


And now that your mouth is watering, let's get moving on to the third installment of So Frikken Crafty! Yay! Aren't you excited? Well I am - mostly because I had to put off so many ideas due to the lack of materials and supplies available to me here on this tiny island. :(

Anyway so this is a super simple way to add a little flair to an old pair of shorts or jeans (if you cut them into shorts like I did). I actually got this idea from Pinterest and they looked so amazing and cute that I just had to add this project to my "To-Done" board. Which I have yet to make. I'll do that now.


Here's what you'll need:

- Lace or crochet applique (If you've got an old lace table cover or a bunch of your grandma's old doilies, go ahead and use it!)

- Denim shorts

- Needle & Thread

And here's what you do with it:

1. Once you've figured out how much lace you'll be using, cut a triangle out each side of your shorts to fit the lace, using the seam as your center point. (If your shorts have a hem, cut that part off to get a frayed look when you wash it)

2. Now that you've got a huge slit on the side of your shorts, sew the lace on. Don't forget to do the other side too!

3. And lastly, add some extra flair by applying the extra lace onto the front and/or back pockets. (I cut another triangle piece out of one of the back pockets and added lace for a peek-a-boo effect)

Well I hope you all liked today's post as much as I did! Please comment below and let me know if you did or didn't! And don't forget to follow me on Pinterest too! Fyi, my name on Pinterest, as well as everything else is FrikkenDuckie. Have a terrific Tuesday everyone!

Monday, April 16, 2012

Makeup Monday Mishap + Award

Okay so I didn't have time to do a tutorial over the weekend so I started recording one this morning. I was halfway through the tutorial when the phone rang, so I had to stop recording, answer the phone, then record another video to pick up where I left off.

Now, I am sooo NOT a video whiz so I don't know how to cut and edit anything at all. Therefore, I will not be posting my tutorial today. Sad face, I know. But fear not, I'm providing you with a tutorial today, just not MY tutorial.


This tutorial is by Andrea of Andrea's Choice back in 2010. It is a very versatile look and it is great for all the colors going on in spring and summer fashion. Try it out, I'd love to see your take on it!

And before I go, here's another award I was given by the amazing Ronida of Portable Sunshine AND Val of Pink & Golden Lights! These two girls are absolutely wonderful, and not just because they awarded me! They are two of my daily reads and I recommend you take a look at their blogs! And here's the award:


Here are the rules for nominating another blogger for this award

Rules:
1. Nominate 15 fellow bloggers who are relatively new to blogging.
2. Let them know that you have nominated them.
3. Share 7 random facts about yourself.
4. Thank the bloggers that have nominated you.
5. Add the Versatile Blogger Award picture to your blog post.

My Nominees: (Okay, so you know how I hate to follow rules? Well I'm bending this 15 people new to blogging rule. Instead, here's a few AWESOME blogs I've come across recently & a few of my versatile faves)

Matsutake
Michelle
Becky
Charlotte-Joy
Allie
Heather
Keena
Nicole
LM Beauty Shines
Lauren
Shahla
Krystal
Nikskie
Halle
Hayley


So here are 7 random facts about me:

1. I like to write in blue ink.
2. I love to sing.
3. Brown Sugar Cinnamon Poptarts are my favorite.
4. I could NEVER be a vegetarian. I loves me some MEAT!
5. Crown Royal makes me black out.
6. If you say something stupid, I will think you are stupid from that point on unless you prove to me otherwise.
7. I like to hoard office supplies at my desk.

There it is. Hope you liked this post! And sorry again for my tutorial fail. I'm browsing video editing software and tips and tricks online right now!

Monday, April 2, 2012

Makeup Monday #1: Peacock

Hooray for the first Makeup Monday post! Are you excited? Well I am, so let's get started!

Products and Instructions:


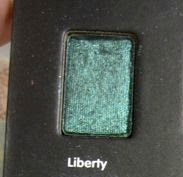
Liberty (Tokidoki Robbery Palette). Alternate: a deep blueish-green with shimmer. Apply this color all over your lid, below the crease.

Nocturnelle (MAC). Alternate: a chrome/metallic purple with pink shimmer. Blend this color into your crease. Be sure to also apply it to the corner of your lids to create your outer "V". Apply the blueish-green color to your lid again if you need to.

Goldmine (MAC). Alternate: an intense shimmery gold. Sweep this color on the inner corner of your eye.

Powersurge (MAC). Actual color is more gold than brown. Alternate: any bronze/gold eyeliner. Line your your lids with this color.

Blacktrack (MAC). Alternate: any black liner. This is to be applied to your lower lash line to add drama.

Keep your lips simple. I just used a clear shimmery lip gloss. And don't forget your mascara!

So before you watch the video below, please read the following warnings first:

1. This is my first makeup tutorial video ever. Ever ever.

2. Don't mind my weird faces I do them all the time. Even if I don't mean to. Oh, and I didn't feel the need to brush my hair for this - which is why it looks so nappy.

3. The lighting sucks. Super sucks. It was raining today and by the time I got around to doing this, it was about 8:30pm so I had to use a lamp to get enough light - so everything looks a bit more yellow than it really is.

4. I cheated and did the same look earlier just so I could remember how to do it, then redid it on video - which is why my bottom lash line was already black.

5. Sorry about the glare from my forehead and nose. I powdered it towards the end though. Lol.

6. I'm not talking in this video. I don't remember the name of the song or the artist - it was some random song I picked on Youtube's Video Editor thing.


There are several other "peacock inspired" makeup looks out there but I think this is a bit more subtle than some others I've seen. I wear this look to work sometimes and it goes perfectly with a simple black top and jeans or your little black dress.

Hope you enjoyed this little tutorial! If you have any questions, comments, or tips for me, please let me know! Seriously though. Obviously I need major help with video editing. And video recording. So HELP!

Oh, and before you go, I wanted to let you know that I'm participating in an Art Journaling challenge this week hosted by Charlotte-Joy! I'm super excited to finish day 1's challenge and I'll be posting it later tonight along with more info about the challenge so you can join in too!

Monday, February 27, 2012

Frikken Featured!

Yay! My "So Frikken Crafty" Aluminum can hair bow is featured by To Sew With Love this week! I'm so excited!


I have a chance to move on to the next round of TSWL's Finest of February 2012, so please vote here:

To Sew With Love: Crafty Saturday Party No. 59


Even if I don't win, I'm still super stoked to have been featured on TSWL and super grateful for everyone who votes!

This totally made my week and I'm super excited to get started on my next craft project this weekend! HINT: Its something from my favorite movie!

♥ Duckie.

Monday, February 20, 2012

So Frikken Crafty #2: "Duck" Tape Bow + Sweet Sins

Yes, it's another "So Frikken Crafty" project! Don't get used to it because I don't know when the next inspiration will hit!

After my last post on my aluminum can bow, my sister Jaxx asked me to post about HER bow craft using duck tape (yes I know it's actually called duct tape, but since I'm DUCKie, and the actual brand of tape I'm using in this craft is really called Duck Tape, for the purposes of this post, it shall be referred to as duck tape). I don't know why she can't post it to her own blog, but oh well.


Anyway, so here's what you'll need:

- Duck Tape. This brand of tape is sold at Home Depot for less than $4.00/roll. They have different patterns and colors so you can make bows for every outfit!


- Scissors. Unless you want to use your teeth to cut the tape. It's really up to you.


- Hair Clips/Bobby Pins. Whatever works for your hair.


Now here are the steps:


1. Put the roll of duck tape between your legs and pull the tape. This is seriously the best method, because you'll need both of your hands for the next steps.


2. Once you've got a long enough section pulled (about 6" or so), fold a section over (how much you fold determines how big your bow will be). This is a little tricky because the tape is so sticky. I recommend sticking your finger between the tape first, so that you can line it up better.


3. Now that you've got a piece folded over, continue folding for a total of 4 folds, then cut your folded piece away from the rest of the roll. 4 folds is just enough thickness to hold and shape your bow.

IMAGE HERE


4. Now that you've got your piece, fold it accordian style 4 times.


5. Pinch your bow in the middle, cut a small piece of tape, and wrap the tape around the middle of your bow.


6. Attach your clip by wrapping a wider piece of tape around the bow and clip. A wider piece of tape will hide the first piece you wrapped.


7. Shape your bow by pushing the ends of the fold up.


8. Put your bow in your hair and show it off to your friends because you're so frikken crafty!


**************************************************


So here's another idea I got from Heather, which is to give up a few bad habits for two whole weeks. Easier said than done, but I decided I might just give it a try since I have a long list of bad habits.

For this first "Sweet Sins" attempt, I've decided to give up cursing. Since I've been on Guam I've realized that I swear more now than I used to when I was living in Hawaii, mostly because my parents aren't around. Growing up, my siblings and I were not allowed to curse at all. Even "shut up" was considered a bad word.

So for the next two weeks I am giving up cursing altogether. We'll see how it goes...

So do you have any bad habits that you want to try and give up? Do you swear like a sailor?

♥ Duckie.