Showing posts with label tasty tuesday. Show all posts

Tuesday, July 17, 2012

Tasty Tuesday: Coffee remix

Just so you know, this is my version of a lazy post.  Okay, pretty much all of my recent posts have been lazy and/or nonexistant.  And I know I'm not the only blogger in a blogging funk right now because I've been seeing a lack of posts in my blog feed lately.

But because I feel obligated to myself and to my lovely readers (you, darlings), I decided to post a lazy recipe today.  Okay, not so much as a recipe than a cool thing to try, but you get the point.


Ingredients:

- Coffee
- Almond milk

Directions:

1.  Brew and freeze coffee in an ice cube tray.

2.  Serve with almond milk.


See, told ya.  Lazy post.  I actually found this "recipe" on Pinterest and thought it was such a cool idea.  Granted, I haven't actually tried it yet (along with all the other things on my pin boards) but I don't think you can go wrong with coffee and almond milk, right?

So if you've tried this, or plan on trying it before I do (which is highly likely), please let me know your thoughts!  I think I'll give this a try over the weekend because I've got to stock up on groceries anyway.

Peace out homies.


♥ Duckie.

Tuesday, July 3, 2012

Tasty Tuesdays: And sometimes I'm lazy...

Lately I've been feeling like a hippo.  You know the feeling.  Bloated, ugly, and CRANKY because of it all.  Well that's what life's been like for me the past few days.  I've been so disgusted with myself that I can't even stand it.  And what's worse is that I keep stuffing my face anyway!

You ever get that way?  Where you're so full and feel so yucky but your mouth still wants more food?  Tell me I'm not alone in this.  It's like I'm 17 again with the munchies.  But guess what?  This body is definitely NOT 17.  And it is NOT acceptable for me to put my body through this because of my insatiable appetite.  I have got to step up my fitness game if my mind decides to keep this food frenzy going.

So last night I was tired, feeling bloated, and lazy.  But I was craving pasta.  Pasta Genovese.  From Pietro's.  All the way downtown.  Needless to say, Joey was not down for it so we went to the grocery store instead because (a) he just wanted a pizza to throw in the oven and (b) I had to find something else to eat.

We scoured the frozen food aisle and I got the Bertolli Shrimp Scampi & Linguine...and Joey just got a DiGiorno pizza.  Now I must say that my expectations weren't that high for this.  I mean, let's face it, frozen food isn't exactly 5 star quality.  Well, besides Hot Pockets...cuz you know I can eat that fo' dayzzzzz.

Anyway, basically you open this bag up, throw it on a hot skillet for a bit and wha-bam!  Dinner is served.  Now I don't know about you but frozen food always tastes bland to me so I just added a little garlic powder and Italian seasoning for more flavor.  Oh, I also took out the bell peppers before I started cooking it because I don't really like them.


All in all, I must say that it turned out pretty good.  It was still a little bland, but that can be easily fixed with some of your own seasonings.  I would buy this again because it is a quick and easy fix and it is very filling...probably because it says it serves 2 and I ate it all. by.  myself.

Now, if you're planning on trying this out on your own here's a couple things that you could try that I think would make this frozen meal AMAZING:

*  Add some lemon.  It'll give the pasta a little zest and will compliment the shrimp nicely.
*  Saute some garlic in your pan first.  Now the package does have slices of garlic in it, but because they've been frozen, you won't get the full garlic flavor just by dumping the whole package in your pan.  Use the chunks of sauce (they look like slices of butter) in the package and cut up some fresh garlic to saute first.
*  Add your own seasonings to taste.  I love the taste and smell of Italian seasonings.  It makes everything so much better.
*  Add a little tomato sauce.  The recipe is pretty saucy so maybe take some of the sauce chunks out before adding tomato sauce.
*  Cheese!  You can never go wrong with cheese.

And that's it folks.  My lazy rendition of Tasty Tuesday.  I know there are a lot of you who aren't so hot in the kitchen so hopefully this helps you microwave chefs get your feet wet.  Let me know if you've tried this product before and what your thoughts on it were!  Or if you'd like to recommend a lazy meal for me to try and experiment with, I'd love to hear it!

Oh, and sorry about not posting yesterday.  Still gotta edit the video tutorial I did.  It'll be up later this week!


♥ Duckie.

Tuesday, June 26, 2012

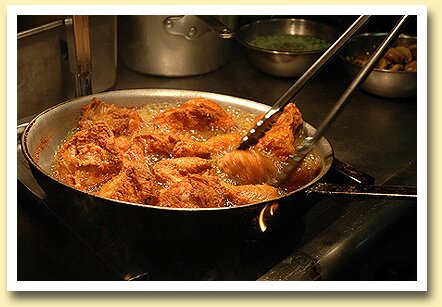
Tasty Tuesday: Fryophobia

Yes folks.  Today we're gonna talk about my fear of frying.  No, not flying, FRYING.

Hot Oil + Delicate Skin = Disaster.

I am terrified of being severely burned and having parts of my skin melt off like Freddy Krueger.  Dramatic?  Yes.  But I blame my fryophobia on TV and the media.

But despite my fryophobia I do LOVE to eat fried foods.  Chicken, potatoes, fish, pickles, ice cream...just batter it up and drop it in a pot of grease, please!  And because I'm cheap I do end up frying my own food once in a while.  With glasses and a longsleeve, standing 3 feet away from the stove, holding the longest pair of tongs we have, trying to flip a piece of chicken.


Ingredients:

- Chicken
- Oil
- Seasoning
- Flour

Directions:

1.  Season and mix your chicken in a bowl.

2.  Once your chicken is seasoned, you have two options.  You could (a) fry it as is or (b) coat it with flour and then fry.  *Flour makes it crunchier but also greasier.  If you opt for flour, you could also mix a little extra seasonings with your flour for added flavor.

3.  Pour oil in pan.  Make sure you put enough to cover at least half the chicken and turn your stove to medium-high. *Be sure to keep an eye on the oil!  If it is too hot, the outside of your chicken will burn while the inside will still be raw.

4.  Dip your fingertips in a little water and flick it into the pan (and stand far away).  If the water droplets pop right away, your oil is ready.

5.  Slowly and carefully add your chicken to the pan and reduce the heat a little to medium/medium-low and cook for about 25 minutes, turning about every 5 minutes or so.

6.  Make sure your chicken is cooked thoroughly (poke it and make sure it drains clear - no blood) and place over paper bags or paper towels to cool.  *Paper bags/towels will absorb any excess oil


This recipe can be kind of a doozy.  The key to it is to keep an eye on the temperature of your oil.  Because not every stove distributes the same amount of heat, it is best to test it out on one piece of chicken first to make sure your heat is at the right temperature.

Also, and most importantly, be careful with the oil!  I've had quite a few incidents where I accidentally dropped the chicken and oil splattered all over the stove top {and once caused a small fire}.

Don't judge me.

Anyway, the reason I posted this recipe is because that's what I made for dinner last night.  Late last night.  Like after 10pm.  And I also whipped up a batch of mashed potatoes from scratch because I was too lazy to wash the rice pot and cook rice.  You know, because making rice is SO hard.  That was sarcasm if you didn't know.

Sorry, I don't have any pictures of dinner last night because (1) Joey kept stealing food while I was still cooking the rest and (2) like I'm really going to get close enough to that pan full of oil to take pictures of it.

Happy frying!

♥ Duckie.

Tuesday, June 5, 2012

Tasty Tuesday: Minizza


Okay, the title is a bit weird but Minizza means mini pizza.  The name was created by the kids when I showed them how to make their own mini pizzas using:

Hamburger buns
Tomato paste
Pepperoni
Shredded cheese
*And whatever else you like on your pizza

Basically, all we do is:

1.  Flatten the buns with our palms - we like more of the thin crust.  ;)

2.  Spread a scoop of tomato paste on the buns.

3.  Sprinkle cheese and layer pepperoni to your liking.  (And add additional toppings if you want)

4.  Place in toaster oven (and turn it on high) until the cheese melts.

5.  Eat it and love it.

This is a perfect recipe to try out with your kids - goodness knows my kids love making and eating minizzas!  Also, the size is perfect for little hands and little mouths (sometimes with big voices).

My son especially loves making these because he gets to help out and use his hands in the kitchen.  And this post is especially for him because today is his 3rd birthday!  So yeah, you know we're going to Chuck-E-Cheese's tonight.  Lol.


♥ Duckie.

Tuesday, May 29, 2012

Happy 4th anniversary of my 23rd birthday to me!

Okay, if you understood the title, you're pretty frikken awesome!  You deserve a pat on the back!  Lol.  If you didn't understand it I'll explain it to you anyway:  It's my 27th birthday today.  Yuck.  See how much better it sounds when I say "I'm celebrating the 4th anniversary of my 23rd birthday"?  Haha.

So anyway, to celebrate this anniversary and because I'm still super stressed and swamped with work/school, let's drink up!


Tokyo Tea


Ingredients:

1/2 ounce vodka
1/2 ounce rum
1/2 ounce gin
1/2 ounce tequila
1/2 ounce triple sec
1 ounce Midori melon liqueur
Sprite/7-up to taste

Directions:

Combine all ingredients in a glass with ice and enjoy!

This drink is pretty strong but tastes much better than a long island.  You could also add a bit of pineapple juice to it to mellow it down a bit.  But I personally love it the way it is and it is a great way to get that buzz at the start of your night.

Btw, I promise I'm not an alcoholic!  I've just been super duper stressed out with these two assignments that I've been in serious need of a little mood lightener.  Anyway, my papers are due tomorrow so I've got to get back to them!

AND don't forget to get your entries in!  Giveaway closes in 3 days!!!


a Rafflecopter giveaway


*Tweet about it daily for more entries!


Tuesday, May 22, 2012

Tasty Tuesday: Sesame Crusted Salmon

My twin Keena requested that I post a healthy-ish recipe today so I decided on this one.  I actually bought the McCormick Recipe Inspirations pack one day to try it.  Since I'm not really one to follow directions, I kinda just used the ingredients in the pack without adding the extra stuff (honey, soysauce, etc.) and made my own thing and it turned out to be awesome.

Ingredients:

2 tsp toasted sesame seeds
1 tsp minced garlic
1 tsp minced onion
3/4 tsp ground ginger
1/2 tsp crushed pepper
2 lbs. salmon fillets
1 tbsp cooking oil

Directions:

1.  Mix dry ingredients in a small bowl.

2.  Coat the salmon with your cooking oil so that it doesn't stick to your pan or foil.

3.  Coat the top of the salmon fillets with the dry ingredients.

4.  Broil (or bake if you prefer) on high until salmon is fully cooked.

5.  Serve with veggies of your choice!


Sorry, I don't have any pictures of how it turned out because Joey and the kids scarfed it down.  Joey doesn't usually eat fish so it was quite surprising that he liked it so much.  I am definitely going to make this again soon!

Oh, and funny story:  we found a baby snake in our bathroom this morning!  I was brushing my teeth and saw something moving on the top shelf where my son's belt was.  At first I thought I was just seeing things because the belt couldn't have moved, but then I saw that the part that was moving was greener than the brown belt and sure enough, a baby snake was curling itself up.

It looks tiny in this photo but it was about the same length as my son.


Trace was really excited (he loves bugs, animals, reptiles, etc.) so he stood in the bathroom watching Joey while he caught the snake.  Once the snake was caught, Joey held it by the head in his hand while Trace walked back and forth under it, purposely making the snake's body and tail wriggle all over his face.  Yes, my son is odd.  The only 2-year-old I know that would purposely put a snake on his face.  Trust me - he did not get that from me.

Hope everyone's having a terrific Tuesday!  I know I am since one of the attorneys in my office brought back some goodies from Japan!  (Green tea Kit-kats will definitely be included in the giveaway prize pack now so don't forget to enter!!)

Strawberry Chocolate Mochi & Green Tea Kit-Kats!  Yum!


Tuesday, May 15, 2012

Tasty Tuesday: Caprese Grilled Cheese

Yay for Tuesday!  Well, not really because my bills are due today.  BOO!

So today I've got an awesome sandwich recipe for you that I found on Pinterest.  I've only been an active pinner for a little while now (see post about losing my Pinterest virginity HERE) but I absolutely love it!

The original recipe came from Yammie's Noshery and the photos posted here are also credited to her.  Her blog is full of wonderful treats and recipes so you can bet I'll be pinning them all soon!


Ingredients

2 slices of Sourdough bread
Butter
Garlic powder
1/2 cup of shredded Mozarella Cheese
Tomato slices
Fresh Basil, chopped


Directions

1.  Butter the bread and sprinkle with garlic powder.
2.  Layer cheese, tomato slices, and basil on bread.
3.  Pop it in your oven/toaster oven or heat on a skillet until both sides are brown and cheese is melted.


Doesn't that just look AMAZING!?  As stated in Friday's post I am a cheese-oholic and this will definitely satisfy my addiction! 

And as a little update on my fitness progress (don't forget to link up on Friday) my body is HURTING!  Going HAM (yeah I totally said that) over the weekend and speed walking (I'm not running yet) 2 miles last night has got me sore all over today.  But that means its working, right?  I'm mostly feeling it in my booty and thighs (damn you squats and touchdowns!) and I can't wait to get my 18-year-old booty back!  But honestly it hurts to sit down and I'm practically yelling when I try to sit on the toilet seat - perhaps its a good idea to get one of those cushioned ones now.  Lol.

Oh, and I'll be working out a lot harder now since (and I don't want to get my hopes up just yet) Joey may be joining the National Guard soon.  He's been wanting to get back into the military for quite some time now but kept getting the run around because nobody could get him in (long story - email me if you wanna hear it).  So finally yesterday they gave him the go ahead so long as his case gets wrapped up soon (crossing fingers!!) and we're excited!  Praying that all goes well and if it does, this year will be amazing!

Have a terrific Tuesday!  I've got to get back to work and finish those homework assignments (yeah, I still haven't finished them)!  And stay tuned tomorrow to see my new favorite dress - it has been hanging on the wall of my living room since I got it. 

Tuesday, May 8, 2012

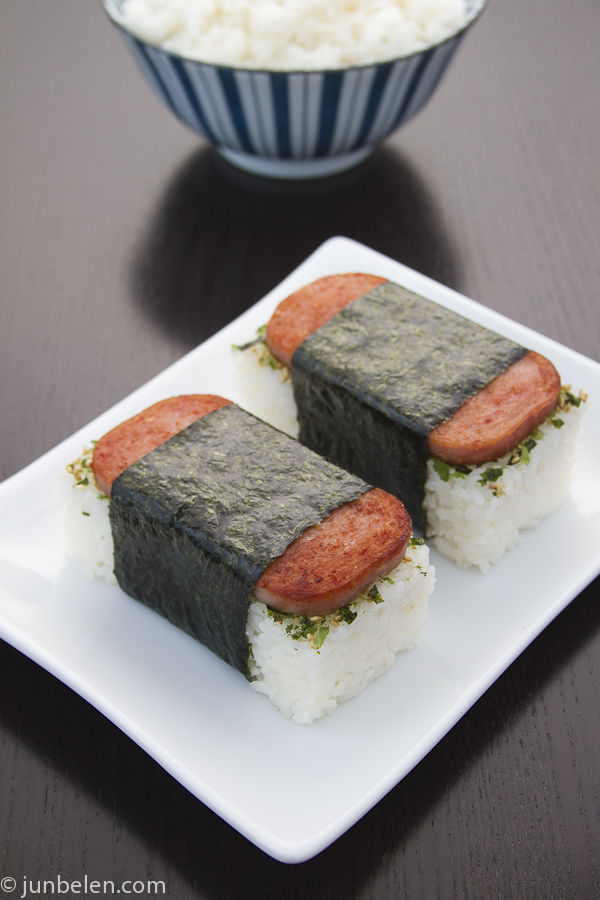
Tasty Tuesday: Spam Musubi

Tada!  It's Tuesday again!  Is it just me or did last week just fly by?

Anyway, so for today's recipe I've decided to share another recipe from my hana-bada days (see here) with you.  This recipe is also for Ronida who has recently found a love for seaweed.


So here's what you need to make a spam musubi (btw, its pronounced moo-suu-bee)

- Rice (a little sticky)
- Spam (sliced and pan fried)
- Seaweed (in strips)
- Nori Furikake (optional)
- Egg (optional)
- Panko bread crumbs (optional)

*To make a simple spam musubi all you really need are the first three ingredients.

Okay, now here's how you make it:

1.  Lay your seaweed strip flat and add a scoop of rice on the strip.  Try to form a rectangle out of the rice.  *Musubi molds make this process much easier and are pretty cheap to purchase.  You could also use a cookie cutter or other shape to mold your rice  (Optional:  Sprinkle some nori furikake over the rice for a little flavor)

2.  Layer a slice of spam on top of your rice and wrap the remainder of the seaweed strip around the spam and rice.

3.  Moisten the end of the seaweed strip with a little water to adhere it and enjoy!  (Optional:  Coat finished musubis with egg and breadcrumbs and pan fry in oil for a fried musubi)


Musubis are great for those days when you're in a rush and need something easy and light to eat.  They're also perfect for kids and you can feed 10 kids with one can of spam!  Musubis are great to pack for lunches and picnics and I know I always packed a musubi when I would go on school field trips.

You can trick out this recipe as much as you want (yeah, I said trick out - so what) depending on your preference.  You can add fried eggs, bacon, ume, veggies, etc.  A musubi is very versatile so you can make it your own.

Anyway, hope you enjoyed today's post.  Something simple and easy - you know, for those times when you really don't feel like cooking much.  Or cleaning.  Or even putting on a pair of pants.

Tuesday, May 1, 2012

Tasty Tuesday + May Day + Homesick


Happy May Day everyone!  May 1st is known as May Day in Hawaii.  It is on this day that we honor the island culture and the beauty of spring by wearing leis and celebrating through dance and song.


A lei (pronounced lay) is a flower garland.  Leis are handmade with aloha (love), and given to loved ones on special occasions such as birthdays, graduation, congratulating, welcoming an arrival, or as a token of affection for someone departing the islands.


Back in my hana bada days (ha-nah bah-dah, meaning boogers - hana bada days refers to younger years when you couldn't wipe your nose properly.  i.e., snot-nosed kid), I remember how big of a deal May Day was.  All the elementary schools on island would put on a May Fest performance and we would also have a May Day court.  The May Day court consisted of a King and Queen, as well as Princes and Princesses to represent each Hawaiian island.  They would all perform a traditional hula to start the ceremony and then sit on a stage and overlook the rest of the performances.

Unfortunately I was never on the May Day court, but I still enjoyed the festivities every time.  It was always such a huge deal.  Parents, Grandparents, Uncles, Aunties, and other family members would take off from work all day to watch their kids performances.  There would be balloons, flowers, leis (of course), and lots of picture taking!  I had always dreamed of watching my own children partake in the May Day festivities, but sadly that day has yet to come since we don't live on island anymore (super sad face).

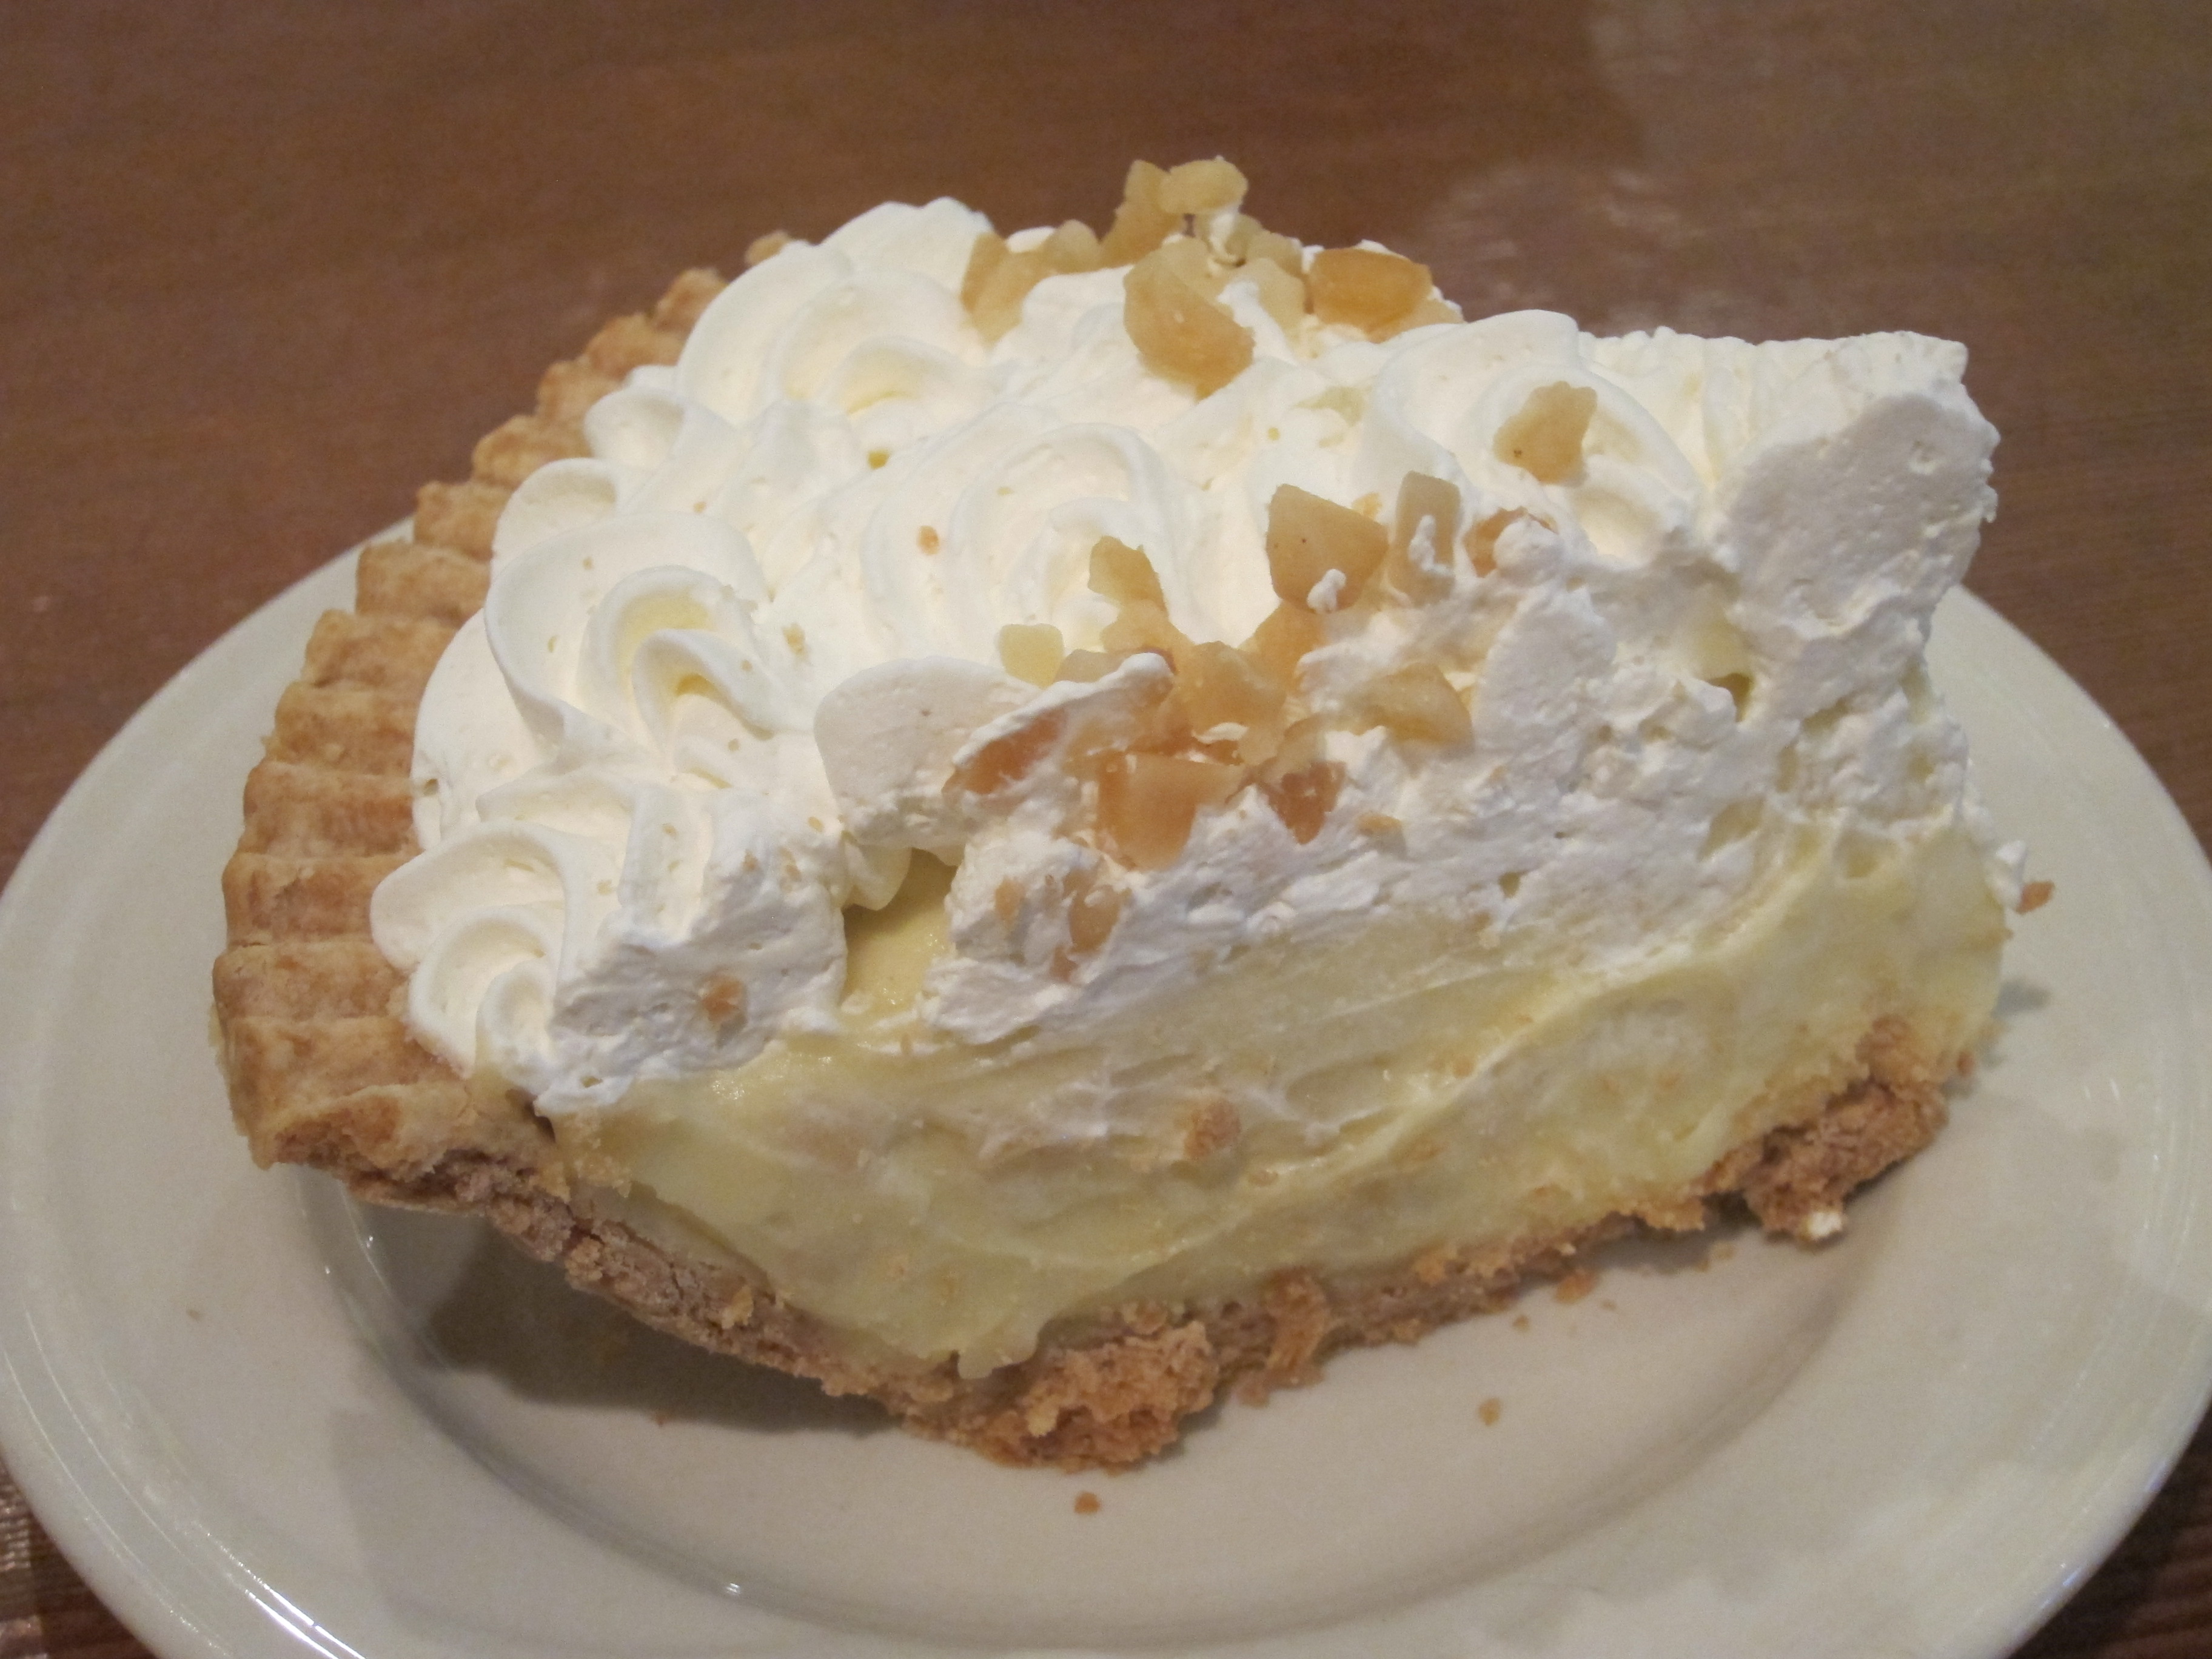
Anyway, in honor of May Day, here's a recipe for one of my FAVORITE desserts, Macadamia Nut Cream Pie.


Ingredients:

• 1-1/3 cup milk
• 3/4 cup sugar
• 1/2 cup chopped macadamia nuts
• Dash salt
• 1 teaspoon vanilla
• 1 egg
• 5 teaspoon cornstarch
• 2 egg whites
• 1 9-inch baking pie shell
• 1 cup heavy cream, sweetened and whipped, or use a container of real whipped cream in a can

Directions:

1.  In a saucepan combine 1 cup of the milk, 1/4 cup of the sugar, 1/4 cup of the nuts, the salt and the vanilla; scald.

2.  Mix the remaining 1/3 cup milk with egg and cornstarch.

3.  Thoroughly stir some of the hot mixture into the egg mixture; return all to saucepan. Cook for 5 more minutes, stirring constantly, until mixture thickens and then cool for 1 hour.

4.  Beat egg whites until soft peaks form then fold carefully into cooled mixture.

5.  Pour into pie shell and chill. Before serving top with sweetened whipped cream or can of whipped cream and remaining 1/4 cup nuts.

Tell me that doesn't look delicious and I'll tell you you're lying.  I could eat this for days.  Fo' Dayyyzzz.  It's a pretty light dessert so no need to worry about getting Kanaks (as in Kanack Attack, see post here) afterwards.

So anyway, obviously I'm totally missing home right now.  I miss my family, my friends, and the atmosphere.  If it were up to me, we'd all go back in a heartbeat - but that's not happening any time soon.  Sure my family is there, but we'd be going back with basically nothing.  No house of our own, no car, no jobs, etc.  As much as I'd love for my kids to grow up there along with all my friends and their kids, it would be extremely hard for us to give them a good quality life by having to start from scratch.  Maybe someday when the economy gets a little better and our bank accounts get a little bigger we'll be able to go back.  But for now we'll just have to wait.


Btw, every time I watch this video or sing this song I start to cry.  So yes, my eyes are tearing right now.

So what about you?  Do you still live where you grew up?  Do you miss home, or are you glad you left?


Oh, and before I forget, please vote for my newest blogging buddy Devon!  She is aspiring to become a professional surfer by joining the Roxy team so please vote for her HERE to make her dream come true!  You can vote once a day, every day until May 8th, so please spread the word!!

Tuesday, April 24, 2012

Tasty Tuesday: Soondubu

This recipe was brought on by my lovely twin, Keena! This girl is amazing and I'm so lucky to have found her. I definitely recommend you stop by her blog and have a look around. She's a great blogger and she doesn't even know it yet! Her posts always make me crack up because of her wit and humor and I just think she's an amazing person!

So Keena went on vacay recently and blogged about a spicy tofu soup called Soondubu. Shame on me and my lack of knowledge about my Korean heritage because I didn't know about this dish until I read Keena's post. Lol. Anyway, so the other day I was too sick and too lazy to call around and find a place that could make this for me so I decided to make it on my own.


I found a recipe online but didn't really follow it so I kinda made it up as I went along. Here's the recipe I found with what I actually used.

Ingredients:

4 cups vegetable stock (I used 1 can of beef stock)
3 tbsp Gochujang (Couldn't find gochujang so I used 2 tbsp of a garlic chili paste)
1 cup water
1/2 cup sliced mushrooms (I just did a handful)
1 medium onion thinly sliced (I used half)
3 cups baby bokchoy (I used 2 baby bokchoy bushels)
2 cups bean sprouts (I grabbed a handful)
3 green onions (unfortunately the market was out of this so I didn't use any)
1 lb tofu crumbled (I used one block of tofu cut into cubes)
1 tbsp oil

Directions:

1. Heat oil in a soup pan and add onions. Cook until translucent.

2. Add chili paste, stock, and water.

3. Bring to a rapid boil.

4. Add all other ingredients stirring frequently.


So obviously I didn't go by the book on this one. But, it did taste AWESOME! Totally cleared my sinuses! Lol. Next time I make it I'll add different ingredients (shrimp, perhaps?) and let you know how that goes too!

Oh yeah, and my beef stew was amazing! The kids cleaned their plates and asked for more! Love when that happens!

Do you have an awesome recipe that you think I should try out? Let me know!

AND don't forget to start emailing me those guest posts! May is just around the corner and if you want to be a featured guest poster, email your draft post to me: frikkenduckie@gmail.com

Tuesday, April 17, 2012

Tasty Tuesday + So Frikken Crafty #3 (finally)

Okay, so to make up for my epic makeup fail yesterday(you like how I did that? Make up for makeup. Lol.) I'm giving you two awesome things today! Woohoo for you!

Let's start off with today's recipe! I have been craving beef stew for a while now, ever since I saw a post on Bison soup over at Made By Girl. Now I've never tried Bison meat, and I doubt they even carry that on Guam so beef stew is the next best thing.

Please be advised that I have never made beef stew before. The last time I remember eating beef stew was a few years back, when I was back home in Hawaii. My parents are great cooks and my dad always comes up with great new recipes all the time. Btw, don't tell him I said that. I'm notoriously rebellious against him and I make it a point to disagree with him about everything. If he finds out that I actually like his cooking, I'll never be able to live that down.

Anyway, so I decided to look up a recipe online, tweak it a little, and try to whip up some beef stew for dinner later this week (possibly tonight). Here's the recipe I'll be using:


Serves: 12
Prep Time: 30 minutes
Cook Time: 1 hour, 30 minutes
Total Time: 2 hours
Ingredients:

3 lbs boneless chuck roast, cut into 2-inch pieces
3 tbsp vegetable oil
2 tsp salt
1 tbsp freshly ground pepper
2 yellow onions, cut into 1-inch chunks
1/4 cup flour
3 cloves garlic, minced
1 cup red wine
3 cups beef broth
1/2 tsp dried rosemary
1 bay leaf
1/2 tsp dried thyme
4 carrots, peeled, cut into 1-inch slices
2 stalks celery, cut into 1-inch slices
3 large russet potatoes, peeled and cut in eighths
1 package of fresh mushrooms, sliced


Directions:

1. On medium-high heat, add the vegetable oil to a large heavy pot (one that has a tight fitting lid).

2. When it begins to smoke slightly, add the beef and brown very well. Do in batches if necessary. Add the salt and pepper as the beef browns.

3. Once browned, remove the beef with a slotted spoon set aside.

4. Add the onions and sauté for about 5 minutes, until softened.

5. Reduce heat to medium-low, and add the flour and cook for 2 minutes stirring often.

6. Add the garlic and cook for 1 minute.

7. Add wine and deglaze the pan, scraping any brown bits stuck to the bottom of the pan. The flour will start to thicken the wine as it comes to a simmer.

8. Simmer wine for 5 minutes, and then add the broth, bay leaves, thyme, rosemary, and the beef.

9. Bring back to a gentle simmer, cover and cook on very low for about 1 hour.

10. Add potatoes, carrots, and celery, and simmer covered for another 30 minutes or until the meat and vegetables are tender. Taste and adjust seasoning.

11. Turn off heat and let sit for 15 minutes before serving.

I'm a big hungry kinda girl so I love me some comfort food but I've also been going through a healthy-ish phase lately so the meat & veggies together is the best of both worlds. Plus, this recipe makes a whole lot of stew, so its perfect to store for a cold rainy day!


And now that your mouth is watering, let's get moving on to the third installment of So Frikken Crafty! Yay! Aren't you excited? Well I am - mostly because I had to put off so many ideas due to the lack of materials and supplies available to me here on this tiny island. :(

Anyway so this is a super simple way to add a little flair to an old pair of shorts or jeans (if you cut them into shorts like I did). I actually got this idea from Pinterest and they looked so amazing and cute that I just had to add this project to my "To-Done" board. Which I have yet to make. I'll do that now.


Here's what you'll need:

- Lace or crochet applique (If you've got an old lace table cover or a bunch of your grandma's old doilies, go ahead and use it!)

- Denim shorts

- Needle & Thread

And here's what you do with it:

1. Once you've figured out how much lace you'll be using, cut a triangle out each side of your shorts to fit the lace, using the seam as your center point. (If your shorts have a hem, cut that part off to get a frayed look when you wash it)

2. Now that you've got a huge slit on the side of your shorts, sew the lace on. Don't forget to do the other side too!

3. And lastly, add some extra flair by applying the extra lace onto the front and/or back pockets. (I cut another triangle piece out of one of the back pockets and added lace for a peek-a-boo effect)

Well I hope you all liked today's post as much as I did! Please comment below and let me know if you did or didn't! And don't forget to follow me on Pinterest too! Fyi, my name on Pinterest, as well as everything else is FrikkenDuckie. Have a terrific Tuesday everyone!

Tuesday, April 10, 2012

Tasty Tuesday

Are you hungry? Well I am, so lets get started!

Today's recipe is easy to make, light on your stomach, and healthy too! I used to make this for myself all the time back in my skinny, gogo dancing days. I ate a lot healthier back then too and bought a South Beach Diet cookbook to try a few things out.

California Lettuce Wrap


Ingredients:

1 lettuce leaf (red or green - your preference)
1 slice turkey breast
1 slice ham
1 slice tomato
1 slice avocado
1 teaspoon lime juice
1 leaf arugula (or watercress)
1 tablespoon ranch dressing (okay, its supposed to be sugar-free ranch dressing)

*Note: I usually just get the variety pack of sliced deli/sandwich meat and use those.

Directions:

1. Place lettuce on plate and layer turkey, ham, and tomato on top.

2. Mash avocado, mix with lime juice, and spoon onto tomato. You could also just skip the mashing by layering the avocado slice on the tomato and sprinkling the lime juice on top.

3. Top with arugula (or watercress) and ranch dressing.

4. Roll it up, secure with toothpick, and eat (but don't eat the toothpick).


This recipe is so versatile and fun. My favorite thing about this recipe is that you could play around with it. Instead of turkey and ham, add a grilled chicken breast. Instead of avocado, add cucumber. You could even use different dressings, add alfalfa sprouts, or even add some shredded cheese to it. Make it your own because after all, you'll be the one enjoying it!

Wednesday, April 4, 2012

Tasty Tuesday + Art Journaling + Liebster Award

Okay so here's the first installment of Tasty Tuesday! Today's recipe is a dessert, one that I haven't had in a while - due to laziness mostly. I actually found this recipe a couple years ago because I had been craving (due to pregnancy) the Chocolate Souffle from California Pizza Kitchen. It's a light chocolate cake that has a melted center that just oozes out. I didn't want to get in the car and drive my pregnant ass all the way over to CPK just to order a dessert (again - laziness) so I found this recipe and it was amazing! A lot richer than the one at CPK, but still delicious! Plus the ingredients were already in our pantry and it only took like 20 minutes to make.


Frikken Chocolate Heaven

So here's your shopping/ingredient list:

4 Ramekins (makes 4 servings)
Baking sheet
4 squares BAKER'S Semi-Sweet Chocolate
1/2 cup butter
1 cup powdered sugar
2 whole eggs
2 egg yolks
6 Tbsp. flour

Now that you've got everything together, here are the instructions:

1. Heat your oven to 425°F.

2. Butter up those ramekins and place them on a baking sheet.

3. Microwave the chocolate and butter in large bowl on HIGH 1 min. or until butter is melted. Mix until chocolate is completely melted then stir in the powdered sugar.

4. Add whole eggs and egg yolks; mix well then stir in flour. Spoon into the ramekins.

5. Pop it in the oven and bake for 13 to 14 min. or until sides of desserts are firm but centers are still soft. Let stand 1 min. then use a butter knife to gently loosen the sides of the cake and flip it upside down onto a dessert plate.

6. Top with powdered sugar or (my personal preference) a scoop of vanilla bean ice cream.


See, doesn't it look soooooo good? Well, it tastes even better! Just don't eat it every night (though you may be tempted to after your first try) or you'll be regretting it 10lbs. later...

And here's my art journal page for today:


The prompt was "Haiku" and my wonderful lover brought me a delicious Red Velvet Frappe this morning and it was sooooooooooo good. Btw, we were totally decked out in spring colors today and we looked awesome. He wore: a long-sleeved lavender button-up with black slacks and I wore: a mint green deep v-neck sweater over a white button halter and a black pencil skirt. I'll probably wear this outfit again for next Wednesday's outfit post because this is just my favorite sweater ever (I've had it since 2006).

And lastly, but definitely not leastly (yes, I just made up a word), I have been given the Liebster Award from a super awesome blogging friend of mine, Ronida of Portable Sunshine! She's pretty amazing (she speaks 3 languages) and you should definitely check out her blog!


1. Give to 5 bloggers with less than 200 followers.
2. That blogger will pass it on to 5 followers.
3. According to Babelfish, Liebster means Dearest.

So congratulations to me! And also to the following bloggers, who I've decided to pass this on to:

Keena
Charlotte-Joy
LM Beauty Shines
Becky
Nicole

Have a great Tuesday everyone!